
If your Mac is throwing up that “Your disk is almost full” warning and you’re staring at System Data consuming 40, 60, even 80 gigabytes of your drive — take a breath. You do not need to spend $40 on CleanMyMac or any other cleanup software to fix this.
I recently recovered more than 60 GB on my own Mac running macOS Sonoma 14.6.1 using nothing but Finder and a handful of Terminal commands. This guide walks you through exactly what I did, in plain English, in the order that makes the most sense if you’ve never done this before.
No tech background required. Just follow along one step at a time.
One thing worth knowing upfront: on macOS Sonoma, Apple tightened the permissions that third-party cleanup apps are allowed to have. That means paid software actually has less access to your files than it used to — so doing this manually isn’t just cheaper, it’s genuinely more thorough.
| Type of Mac User | Apps You Probably Have | Realistic Recovery |
|---|---|---|
| Casual (browsing, email, streaming) | Chrome, Spotify, Zoom | 5–15 GB |
| Creative professional | Adobe CC, Canva, Figma | 20–40 GB |
| Video creator | Premiere, DaVinci, CapCut | 30–60+ GB |
| Blogger / SEO | Chrome, Screaming Frog, Canva | 15–35 GB |
| Developer / AI power user | Xcode, Docker, VS Code | 20–50+ GB |
Before You Touch Anything: Do These Two Things First
Before we start digging around in your Mac’s storage, do both of these. They take five minutes and will save you from any accidental headaches.
- Back up your Mac.
Use Time Machine, iCloud, or an external drive. To start a Time Machine backup: plug in an external drive → Apple Menu → System Settings → General → Time Machine → Add Backup Disk. - Screenshot your current storage screen.
Go to Apple Menu → System Settings → General → Storage. Take a screenshot. This is your before photo — you’ll want it later when you see how much space you recovered.

What Is “System Data” on Mac and Why Does It Get So Big?
Before we start deleting things, it helps to understand what you’re actually looking at.
System Data is a catch-all category that macOS Sonoma uses to group hidden files that don’t fit neatly into your Documents, Photos, or Apps categories. It includes:
- App caches — temporary files apps save to load faster, which almost never clean themselves up
- Application Support files — databases, offline content, project data, and assets your apps download and store locally
- Log files — records apps keep of their own activity, most of which you will never need
- Virtual machine environments — files downloaded by developer tools, AI coding assistants, and virtualization software to run local environments
- Temporary system files — files macOS creates during updates and background processes that sometimes linger
- Local Time Machine snapshots — automatic local backups macOS holds onto between external drive connections
None of these are malicious. Most of them served a purpose at some point. But they accumulate silently over months and years, and macOS is deliberately conservative about cleaning them up on its own — it doesn’t know which ones matter to you. That’s what we’re going to figure out together.
Step 1: Open Terminal
Terminal is a text-based interface that lets you communicate directly with macOS. Every command in this guide either shows you information or directs you to use Finder to do the actual deleting. Nothing runs automatically. You are always in control of what gets removed.
How to open Terminal on macOS Sonoma:
- Press Command (⌘) + Space to open Spotlight
- Type Terminal and press Enter
- A window with a blinking cursor appears — you’re in
Step 2: Check Your Current Free Space
Before anything else, get your baseline number.
Run:
df -h /
Output example:
Filesystem Size Used Avail
/dev/disk3 228Gi 144Gi 84Gi
What this means:
- Size = Total drive capacity
- Used = Space currently occupied
- Avail = Your actual free space right now
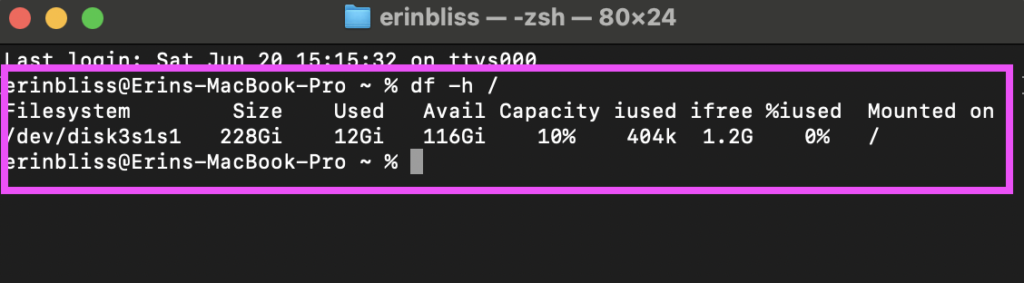
Write down or screenshot the Avail number. This is your starting point. Every step from here is designed to increase it.
Step 3: Scan Your Entire Home Folder for Large Directories
Your Home Folder is the master folder that contains everything personal on your Mac — Documents, Downloads, Desktop, Pictures, and the hidden Library folder. This command ranks everything inside it by size so you can immediately see where your storage is going.
Run:
du -hd 1 ~ 2>/dev/null | sort -hr
Your Mac will scan for 15–45 seconds, then output a ranked list:
- 56G /Users/yourname
- 29G /Users/yourname/Library
- 8G /Users/yourname/Downloads
- 6.3G /Users/yourname/Pictures
- 3.1G /Users/yourname/Documents
What to flag for investigation:
- Over 1 GB = worth a look
- Over 5 GB = significant
- Over 10 GB = major storage consumer
Your Downloads folder being large is common and easy to address — go through it manually and delete or move to your external hard drive anything you no longer need. The Library folder is almost always the biggest hidden culprit, and that’s where the rest of this guide focuses.
Step 4: Clear Application Caches
Caches are temporary files apps create to run faster. Spotify saves song data. Chrome saves website assets. Zoom saves meeting components. Every app on your Mac is quietly building a cache — and almost none of them clean up after themselves.
Run:
du -sh ~/Library/Caches/* 2>/dev/null | sort -hr | head -20
Common space consumers you might find:
- Browsers: Chrome, Firefox, Brave, Arc — can each accumulate 500MB to 3GB+
- Music and video streaming: Spotify, Apple Music, YouTube clients — offline caches grow large fast
- Creative apps: Adobe Creative Cloud apps, Affinity Photo, Sketch, Figma desktop
- Communication tools: Zoom, Slack, Microsoft Teams, Discord — all cache media and assets heavily
- Cloud storage clients: Dropbox, Google Drive, OneDrive — local index and thumbnail caches
- Email clients: Spark, Airmail, Outlook — attachment and message caches
- AI tools: ChatGPT desktop, Claude desktop, Perplexity — model and response caches
The rule: nearly every folder inside ~/Library/Caches is safe to delete. Apps rebuild their caches automatically the next time you open them. You may notice a slightly slower first launch — that’s it.
Do not delete the Caches folder itself. Go inside it and remove individual app folders.
How to delete caches in Finder:
- Open Finder
- Press Command (⌘) + Shift + G
- Type ~/Library/Caches and press Enter
- Match the largest folders to your Terminal output
- Right-click → Move to Trash
- Empty Trash when finished
Potential savings: 2–15+ GB
Step 5: Investigate Application Support — Where the Real Storage Is Hiding
This is the most important folder in this entire guide. Application Support is where apps store data they actually use — and on most Macs, it contains the single largest hidden storage consumers.
Run:
du -sh ~/Library/Application\ Support/* 2>/dev/null | sort -hr | head -30
What you might find and what it means:
- Video editing apps (Final Cut Pro, DaVinci Resolve, Adobe Premiere, CapCut): These store render files, proxy files, and project databases that can easily reach 10–50 GB
- Browser data (Chrome, Firefox, Brave): Profile data, extensions, and offline storage — often 2–8 GB per browser
- Communication apps (Slack, Microsoft Teams, Discord, Zoom): These download and locally store every file, image, and video ever shared with you — Slack alone can hit 5–20 GB on active work accounts
- Cloud storage clients (Dropbox, Google Drive, OneDrive): Local database files and sync caches separate from your actual synced files
- AI coding and developer tools (Xcode, Docker, VS Code, AI assistants with local models): These download entire runtime environments and virtual machine bundles that can reach 10–30 GB
- Game clients (Steam, Epic Games Launcher): Game installation data, shader caches, and update staging files
- Password managers and security tools: Generally small, but worth checking
Critical rule for this folder: Do not delete anything here without opening the folder first to see what’s inside. Unlike caches, some Application Support folders contain data you want to keep — saved projects, account data, downloaded content you’d have to re-download. Inspect before you remove.
Potential savings: 5–50+ GB depending on your app usage
Step 6: Find and Remove Video Proxy Files
If you have ever used any video editing software, this step alone could recover more storage than everything else combined.
Video editing apps create proxy files — lower-resolution copies of your footage that the editor uses for smooth playback during editing, because full 4K footage is too heavy to scrub in real time. These files are temporary by nature. Once a project is done, they serve no purpose. But no app deletes them automatically.
Common locations to check:
Final Cut Pro:
du -sh ~/Movies/Final\ Cut\ Pro\ Backups/* 2>/dev/null | sort -hr
du -sh ~/Library/Application\ Support/ProApps/* 2>/dev/null | sort -hr
DaVinci Resolve:
du -sh ~/Library/Application\ Support/Blackmagic\ Design/* 2>/dev/null | sort -hr
Adobe Premiere Pro:
du -sh ~/Documents/Adobe/Premiere\ Pro//Media\ Cache 2>/dev/null | sort -hr
Generic check for any video editor proxy folders:
find ~ -type d -name “Proxies” 2>/dev/null
How to remove proxy files safely:
Always use the app’s built-in cleanup tool first. In Final Cut Pro: Final Cut Pro menu → Delete Generated Library Files. In DaVinci Resolve: Playback menu → Delete Render Cache. In Premiere Pro: Edit → Preferences → Media Cache → Delete. If you no longer use the app or the project, you can also delete the folder directly in Finder.
Potential savings: 5–50+ GB
Step 7: Reclaim Storage from Messaging and Communication Apps
Slack, Microsoft Teams, Discord, and Zoom are among the worst offenders on this list, and most people never think to check them.
Every image, video, GIF, and file that has ever been sent to you in these apps has been downloaded and cached locally. On an active work Slack account, this can reach 10–20 GB or more. Teams is often worse.
Check what they’re storing:
du -sh ~/Library/Application\ Support/Slack 2>/dev/null
du -sh ~/Library/Application\ Support/Microsoft/Teams 2>/dev/null
du -sh ~/Library/Application\ Support/discord 2>/dev/null
du -sh ~/Library/Application\ Support/zoom.us 2>/dev/null
How to clean these up:
- Slack: Preferences → Advanced → clear cache, or quit Slack and delete ~/Library/Application Support/Slack/Cache
- Microsoft Teams: Settings → Privacy → Clear Cache
- Discord: Quit Discord, then delete ~/Library/Application Support/discord/Cache
- Zoom: Quit Zoom, then delete ~/Library/Application Support/zoom.us/data and the Cache folder
Potential savings: 2–20+ GB
Step 8: Clear Out Browser Data and Profiles
Most people run at least two or three browsers on their Mac. Each one stores cached website data, downloaded files, and profile information locally — and they all grow continuously.
Check total browser storage:
du -sh ~/Library/Application\ Support/Google/Chrome 2>/dev/null
du -sh ~/Library/Application\ Support/Firefox 2>/dev/null
du -sh ~/Library/Application\ Support/com.apple.Safari 2>/dev/null
du -sh ~/Library/Application\ Support/Arc 2>/dev/null
du -sh ~/Library/Application\ Support/BraveSoftware 2>/dev/null
The best way to clear browser storage is from within the browser itself:
- Chrome: Settings → Privacy and Security → Clear Browsing Data → select Cached Images and Files → set time range to All Time
- Firefox: Settings → Privacy & Security → Clear Data → check Cached Web Content
- Safari: Develop menu → Empty Caches (you may need to enable Develop menu in Safari Settings → Advanced first)
- Arc and Brave: follow the same path as Chrome since both are Chromium-based
Additionally, if you have multiple Chrome profiles (personal, work, etc.) or old Firefox profiles you no longer use, removing unused profiles from within each browser can recover significant space.
Potential savings: 1–8+ GB per browser
Step 9: Check Developer and AI Tool Environments
If you have ever installed Xcode, Docker, any AI coding assistant, or any local development environment, this step is critical.
These tools download entire operating system environments, runtime bundles, container images, and virtual machines to your local drive. They are enormously useful — and enormously large.
Check the most common locations:
Xcode simulators (a notorious storage hog):
du -sh ~/Library/Developer/CoreSimulator/Devices 2>/dev/null
Docker images and containers:
du -sh ~/Library/Containers/com.docker.docker 2>/dev/null
General developer tool storage:
du -sh ~/Library/Developer/* 2>/dev/null | sort -hr
AI tool local environments:
du -sh ~/Library/Application\ Support/Claude 2>/dev/null
du -sh “~/Library/Application Support/com.openai.chat” 2>/dev/null
How to clean these up:
- Xcode simulators: Open Xcode → Window → Devices and Simulators → delete any simulators you no longer need. Or run: xcrun simctl delete unavailable
- Docker: Open Docker Desktop → go to Troubleshoot → Clean / Purge data, or remove images you’re no longer using from the Images panel
- AI tools: Cache folders inside these directories are always safe to delete. Virtual machine or model bundles can be removed if you only use the app for basic tasks and don’t need local code execution
Potential savings: 5–30+ GB for developers, 1–12 GB for AI tool users
Step 10: Remove Leftover Files from Uninstalled Apps
This is one of the most overlooked storage problems on Mac. When you drag an app to the Trash to uninstall it, macOS only removes the application file itself — it leaves behind everything in Application Support, Caches, Logs, and sometimes Preferences.
Scan for orphaned app data — folders that exist in Application Support but whose corresponding app is no longer installed:
ls ~/Library/Application\ Support/
Go through this list in Finder and look for folder names belonging to apps you removed months or years ago. Common culprits include:
- Old Adobe apps (Photoshop, Lightroom, Premiere, Illustrator): Check ~/Library/Application Support/Adobe, ~/Library/Caches/Adobe, and ~/Library/Logs/Adobe
- Old Microsoft Office installations: ~/Library/Application Support/Microsoft
- Old creative tools: Sketch, Principle, Framer, older versions of Affinity apps
- Old game clients: Steam, Epic, GOG Galaxy
- Old communication apps: Skype, Slack from previous jobs, old versions of Zoom
Safe to delete: any Application Support folder whose app you have already uninstalled and have no intention of reinstalling.
For Adobe specifically, always run the official Creative Cloud uninstaller for any Adobe product before manually removing folders. Adobe’s files are interconnected and the uninstaller handles dependencies correctly.
Potential savings: 1–15+ GB depending on your app history
Step 11: Clear Log Files
Log files are records that apps and macOS keep of their own activity. They’re useful for debugging software problems — but for most users, they’re just quietly accumulating disk space you’ll never reclaim otherwise.
Run:
du -sh ~/Library/Logs/* 2>/dev/null | sort -hr | head -20
Common large log folders:
- Adobe Creative Cloud — often 500MB to 2GB of logs even on active installations
- Microsoft Office and Teams — can accumulate hundreds of megabytes
- Old videoconferencing apps — GoToMeeting, WebEx, and similar tools leave large logs even after uninstalling
- iOS device backups logs — if you’ve connected multiple iPhones or iPads to this Mac
Old log files are safe to delete. Open ~/Library/Logs in Finder and remove folders from apps you no longer use, or large folders from current apps you’ve never needed to troubleshoot.
Sonoma note: On macOS Sonoma, some system-level logs are stored in a protected system location and will not appear in this scan. That’s expected behavior — you’re not missing anything you can or should touch. Focus on the app-specific folders you can see.
Potential savings: 500MB–3+ GB
Step 12: Check Local Time Machine Snapshots
macOS Sonoma automatically creates local Time Machine snapshots — point-in-time copies of your system stored directly on your drive — even when your external backup drive isn’t connected. This is a useful safety feature, but a long list of old snapshots can hold onto significant storage.
Check your current snapshots:
tmutil listlocalsnapshots /
You’ll see entries like:
- com.apple.TimeMachine.2024-08-14-093021
- com.apple.TimeMachine.2024-10-02-110455
- com.apple.TimeMachine.2025-01-18-142200
macOS Sonoma will automatically purge older snapshots when your drive starts running low on space — but if you have a very long list and want to proactively free space, you can delete a specific snapshot with:
tmutil deletelocalsnapshots YYYY-MM-DD
Replace YYYY-MM-DD with the date from the snapshot entry you want to remove.
Do not delete your most recent snapshot if you are not currently backed up to an external drive. That snapshot may be your only recent backup.
How Much Storage Can You Realistically Recover?
Results vary depending on which apps you use and how long it’s been since your last cleanup. Here are realistic ranges based on the most common Mac user profiles:
- Casual user (browser, email, streaming apps): 5–15 GB
- Active professional (creative apps, communication tools, cloud storage): 20–40 GB
- Content creator or video editor: 30–60+ GB
- Developer or AI power user: 20–50+ GB
My personal cleanup on macOS Sonoma 14.6.1 recovered just over 60 GB — taking available storage from 84 GB to 116 GB on a 228 GB drive.
Monthly Mac Storage Maintenance Checklist
Run these five commands once a month. The whole thing takes ten minutes and prevents “System Data” from silently eating your drive again.
Check free space:
df -h /
Find large directories in your Home folder:
du -hd 1 ~ 2>/dev/null | sort -hr
Check Application Support:
du -sh ~/Library/Application\ Support/* 2>/dev/null | sort -hr | head -20
Check caches:
du -sh ~/Library/Caches/* 2>/dev/null | sort -hr | head -20
Check log files:
du -sh ~/Library/Logs/* 2>/dev/null | sort -hr | head -20
This guide reflects a real storage cleanup performed on macOS Sonoma 14.6.1 on a 228 GB Mac. File paths, command syntax, and permission behaviors are specific to Sonoma. Always back up your Mac before making significant changes to your Library files. Results will vary based on installed applications and usage history.
Frequently Asked Questions
Is it safe to delete files from ~/Library/Caches?
Yes, for individual app folders inside the Caches directory. Apps automatically rebuild their cache the next time they launch. You may notice a slightly slower first load — that’s the only side effect. Never delete the Caches folder itself, only the app-specific folders inside it.
Will deleting Application Support files delete my apps?
No. Application Support contains data your apps store, not the apps themselves. The app lives in your Applications folder. However, some Application Support data is important — saved project files, account databases, offline content — so always inspect a folder before deleting. When in doubt, leave it alone.
What exactly is System Data in macOS Sonoma?
System Data is a storage category that groups hidden files macOS doesn’t classify as Apps, Documents, or Photos. It includes caches, logs, Application Support files, virtual machine environments, and temporary system files. You can’t delete it as a single unit — but you can delete the individual file categories inside it, which is what this guide covers.
Why doesn’t Sonoma clean this up automatically?
macOS does purge some files automatically when storage gets critically low — but it’s deliberately conservative. It doesn’t know whether your video proxy files from a completed project or your old crawl databases are important to you. Manual cleanup gives you informed control over what stays and what goes.
Do I need to restart my Mac after cleaning up?
Not required, but recommended after a large cleanup. A restart helps macOS fully register the freed space and clears any remaining temporary files held in memory. Especially worth doing if you recovered 15 GB or more.
What if I delete something I need by accident?
Files moved to Trash are not permanently deleted until you empty the Trash. If you realize you removed something important, open the Trash, right-click the file, and select Put Back. This is why the guide always recommends moving to Trash rather than using any force-delete commands.
Is Terminal safe for beginners?
Every Terminal command in this guide is read-only — it shows you information about your Mac and does not delete anything. All actual deletions happen in Finder, where you manually move things to Trash. Think of Terminal here as a flashlight that helps you see what’s taking up space.
Does this work on MacBook Air, MacBook Pro, and iMac?
Yes. This guide applies to any Mac running macOS Sonoma 14.x, on both Apple Silicon (M1, M2, M3, M4) and Intel processors. File paths and Terminal commands are identical across all Mac models and chip architectures.
Will this void my warranty or affect Apple support?
No. Deleting your own files from your own Library folder is normal user activity. You are not modifying system files, altering macOS, or doing anything that would affect your warranty or AppleCare coverage.
Sources
macOS Storage and System Data
Apple Support (2025). About storage optimization on your Mac. support.apple.com — Official Apple documentation on how macOS Sonoma categorizes storage, how the System Data category is calculated, and how on-device storage optimization functions on Apple Silicon and Intel Macs.
Apple Support (2025). If you need more storage space on your Mac. support.apple.com — Apple’s official guidance on identifying and safely managing large files, caches, and downloads on macOS Sonoma.
Application Caches and Library File Behavior
Howard Oakley, The Eclectic Light Company (2024). Understanding Mac caches: what they are and when to clear them. eclecticlight.co — Technical analysis of cache behavior across macOS versions including which types are safely removable and how apps respond post-deletion on Sonoma.
macOS Sonoma Permissions and Third-Party App Access
Apple Support (2024). Control access to files and folders on Mac. support.apple.com — Documents the file access permission changes in recent macOS versions that limit what third-party cleanup utilities are permitted to access in the Library folder.
Time Machine Local Snapshots
Apple Support (2025). About Time Machine local snapshots. support.apple.com — Explains how macOS Sonoma stores local snapshots, when they are automatically purged by the system, and how to manage them manually via Terminal.
Xcode Simulator Storage Management
Apple Developer Documentation (2025). Deleting Xcode Simulators. developer.apple.com — Official guidance on identifying, managing, and safely removing Xcode simulator devices that accumulate storage over time on developer machines.
Docker Storage Management on macOS
Docker Documentation (2025). Docker Desktop for Mac — Disk utilization. docs.docker.com — Explains how Docker stores images, containers, and volumes locally on macOS and how to reclaim space using Docker Desktop and command-line tools.